July pedicures always feel a little more exciting to me than any other summer beauty detail. They are small, sure, but they change the whole mood the second sandals come out. So what feels right for summer 2026? Bright color, playful pattern, clean French details, and a festive July moment all have a place.
I keep coming back to toe nail looks that feel fun but still polished. The best July toe nails design ideas are the ones that look easy to wear at the beach, at a backyard dinner, or while running out for iced coffee. Here is the kind of inspiration I would save for a summer mood board, one design at a time.
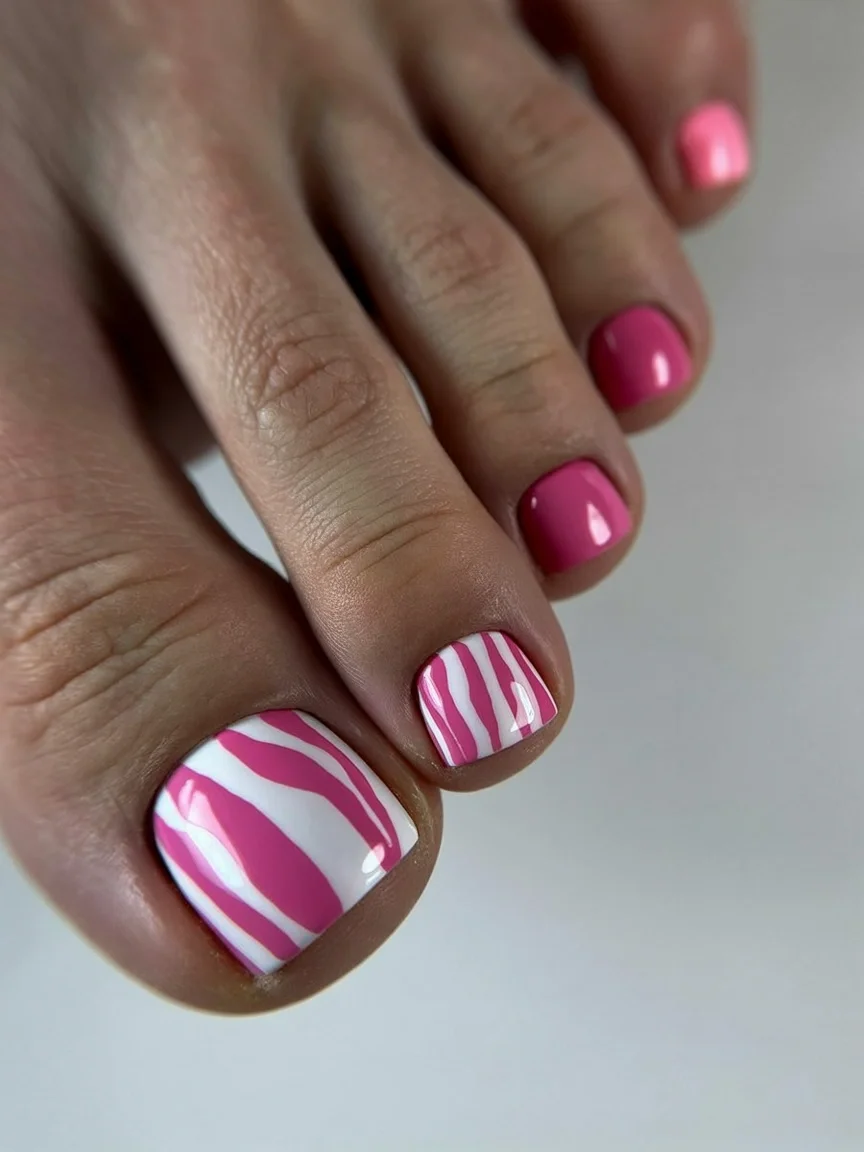
Pink Zebra Waves for a Bold Summer Mood
There is something instantly cheerful about this pink and white zebra-inspired pedicure. I like how the glossy hot pink nails keep the look playful, while the striped accent nail adds a little movement and attitude. It feels youthful, but not in a loud way. More like a confident summer twist that still looks clean and wearable.
To recreate this look, I would use a bright pink gel polish, a crisp white gel, and a very thin nail art brush. A shade like OPI Strawberry Margarita or a similar saturated pink works beautifully here, because the color needs enough energy to hold up next to the white stripes. A shiny top coat is important too, since the gloss is part of what makes the design feel fresh.
At home, I would start with a smooth pink base on most toes and then build the zebra pattern on the accent toe. I like drawing the curved lines slowly instead of trying to make them perfect. That little bit of movement is what gives the design its personality. Celebrity nail artists often remind us that nail art does not need to look overly rigid to feel intentional, and this is exactly that kind of look.
For me, this is one of those 4th of july toe nails design simple-style ideas that still works beyond the holiday itself, even though the colors feel especially bright for summer. It is the kind of pedicure that makes even a basic pair of slides look a little more styled. A small detail, yes, but a strong one.
Neon Lime with Rainbow Swirls for a Fun Pop of Color
This design feels like summer in its most playful form. The neon lime polish is already a statement, but the rainbow swirl on the big toe takes everything further. I love how it has that carefree, vacation energy without needing rhinestones, glitter, or anything extra. It is bold, but the shape keeps it neat.
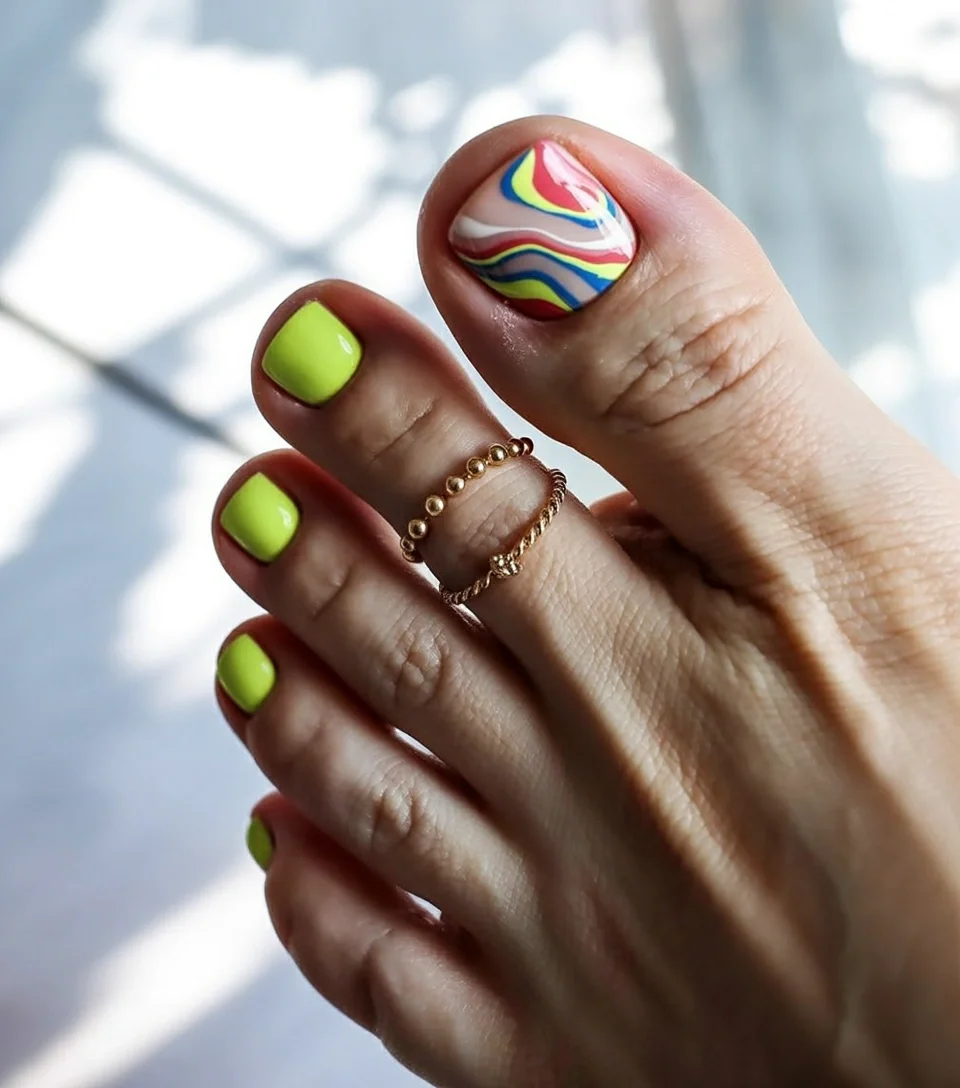
For materials, I would reach for a vivid neon green gel, a nude or soft pink base, and several thin art colors in red, blue, yellow, and white. A liner brush and a dotting tool make the swirl easier to control. If I were doing this at home, I would keep the color palette bright but limited so the design stays crisp instead of turning muddy.
The application is simple in theory, but patience matters. I would paint the neon green on the smaller toes first and cure each layer properly. Then I would create the swirl on the big toe, working from the center outward with curved strokes. The best advice I have seen from beauty editors is to use thin layers when doing detailed art, and I completely agree. It gives you cleaner lines and better control.
This is exactly the kind of pedicure that makes me think of festival weekends, pool days, and long July sunsets. If you like nails that feel joyful the second you look down, this one absolutely delivers. It is loud in the best possible way.
Pink Leopard Print for a Soft Girly Edge
Leopard print can go edgy fast, but this version keeps it sweet. The soft pink base makes the whole look feel light and feminine, while the bright pink spots bring just enough contrast to make it interesting. I love designs like this because they read as trendy without trying too hard.

To build this look, I would use a pastel pink gel for the base and a deeper pink or berry-toned polish for the leopard pattern. A small dotting tool or even the tip of a fine brush works well for the spots. The most important thing is to keep the shapes irregular, because that is what makes leopard art look believable and not overly planned.
I would start with a smooth pink foundation and let it cure fully before adding the spots. Then I would place the color in scattered, uneven shapes and leave tiny open spaces between them. That’s the trick that keeps the pattern airy. I always think of this as one of those designs where less precision actually makes it look better.
For me, this is a perfect toe nails designs 4th of july option only if you want something that feels festive through color rather than obvious holiday graphics. It also works beautifully for regular summer wear, which is why I would happily save it for July and beyond. Cute, easy to wear, and just a little bit flirty.
Pastel French Curves for a Clean Everyday Look
This is the kind of pedicure that quietly makes everything around it look more expensive. The sheer nude base feels clean and natural, while the curved pastel tips in blue, green, and yellow give the whole design a soft summer lift. I like how it feels modern without losing that classic French polish people always return to.
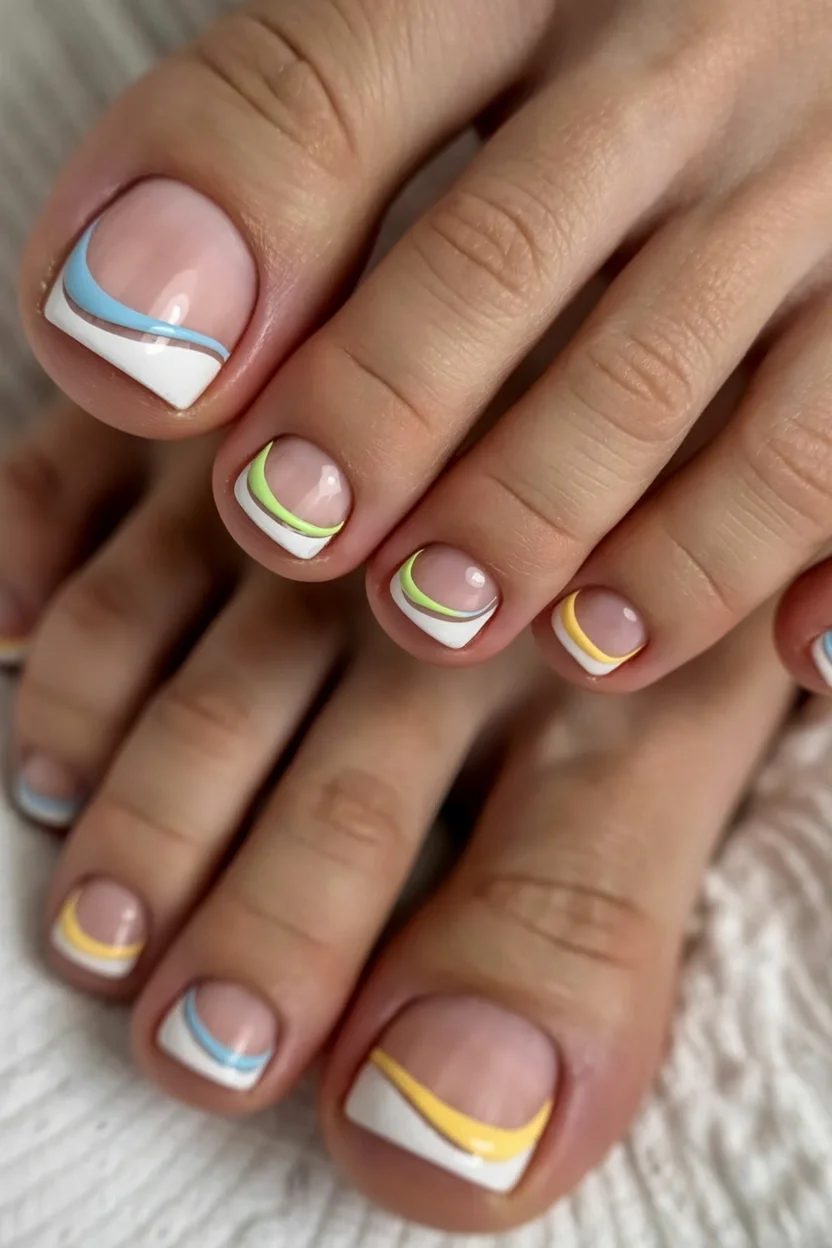
For this look, I would use a sheer nude or blush gel, then add pastel tones with a liner brush for the curved tips. A milky white base under the color can help the arcs stand out more clearly. Brands like OPI, Essie, and The GelBottle all have shades that work well for this kind of soft, tidy finish.
I would begin with a perfectly even nude layer, because the base matters a lot here. Then I would sketch each curve slowly so the colored line sits neatly above the white edge. It does not have to be symmetrical in a stiff way; the charm comes from the fact that it feels delicate and a little unexpected. That is also why this style keeps showing up in beauty editor roundups year after year.
This is one of my favorite july 4th toe nails designs simple ideas for people who prefer something lighter than full holiday art. It is polished enough for any summer event, but still soft enough for everyday life. In other words, the kind of pedicure that works with everything in the closet.
Red White and Blue Fireworks for a Festive Fourth of July Finish
Now this is the one that turns heads. The red, white, and blue palette instantly sets the tone, and the little firework bursts on the big toes make the design feel unmistakably festive. I like how it balances classic patriotic colors with a playful art element, so it never feels flat or overly literal.
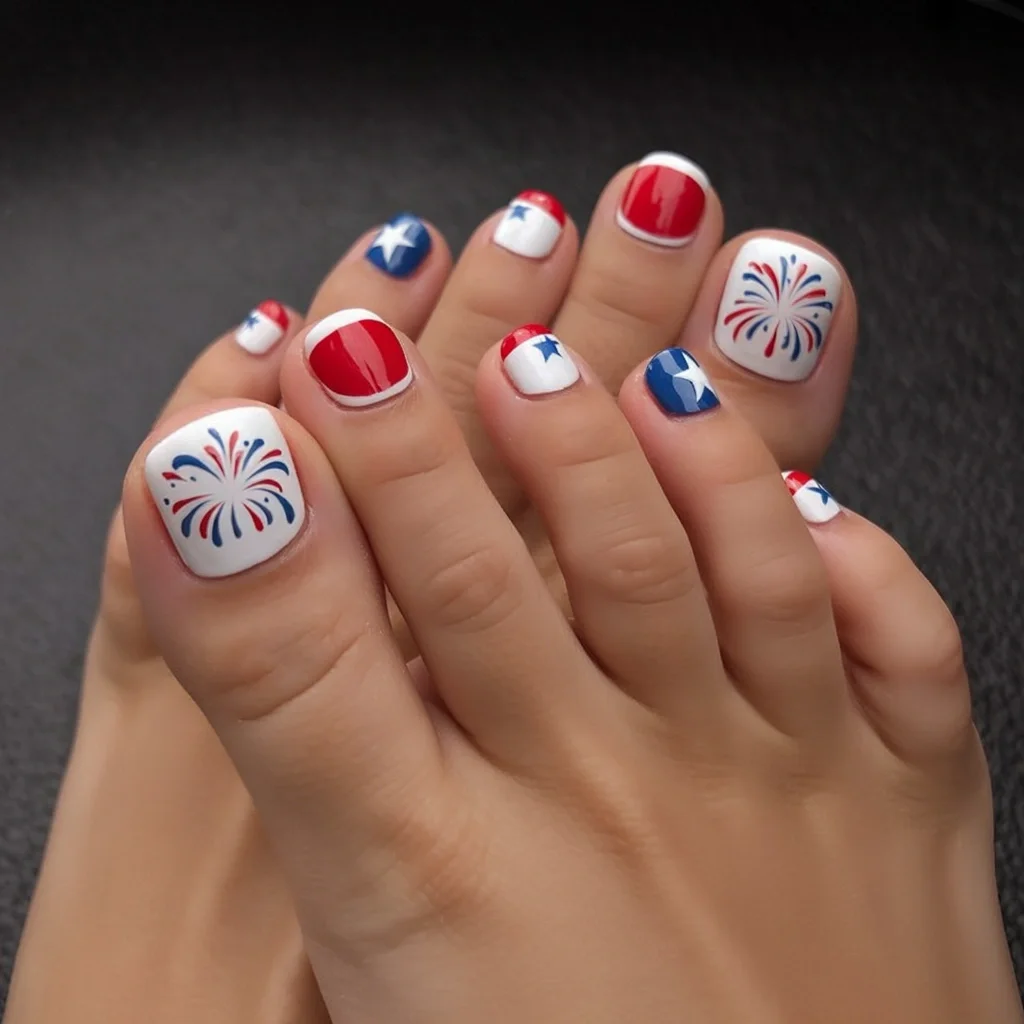
For a look like this, I would use a bright red, a crisp white, and a deep navy blue. A fine detailing brush is essential for the fireworks and tiny stars, and a glossy top coat keeps everything sharp. If I were choosing products, I would think in terms of strong coverage and highly pigmented color, because these shades need to stay bold side by side.
The process is easiest when broken into stages. I would paint the base colors first, cure them fully, and then add the little star and burst details with a thin brush or dotting tool. The final top coat matters here more than usual, because it keeps the lines clean and gives the design that polished salon finish. I have seen plenty of U.S. beauty editors point out that holiday nails work best when the execution feels neat, and this design proves the point.
This is exactly the sort of look people search for under 4th july toe nails design, july 4th nails designs toe, 4th of july nail designs for toe nails, and 4th of july toe nails art designs. I would also call it a strong answer to fourth of july toe nails designs and fourth of july toe nails designs simple if you want a festive idea that still feels wearable. It is celebratory, clear, and very July, which makes it a perfect final note for the holiday week.
Neon Green French Frame for a Fresh Summer Update
Just when it seems like every neon pedicure has been done before, a design like this comes along and feels completely new. The bright lime green polish already captures the energy of July, but the framed accent nail gives it a cleaner, more elevated finish. I love how the vivid green outline draws attention without overwhelming the white center. It feels sporty, modern, and incredibly fresh for summer 2026.
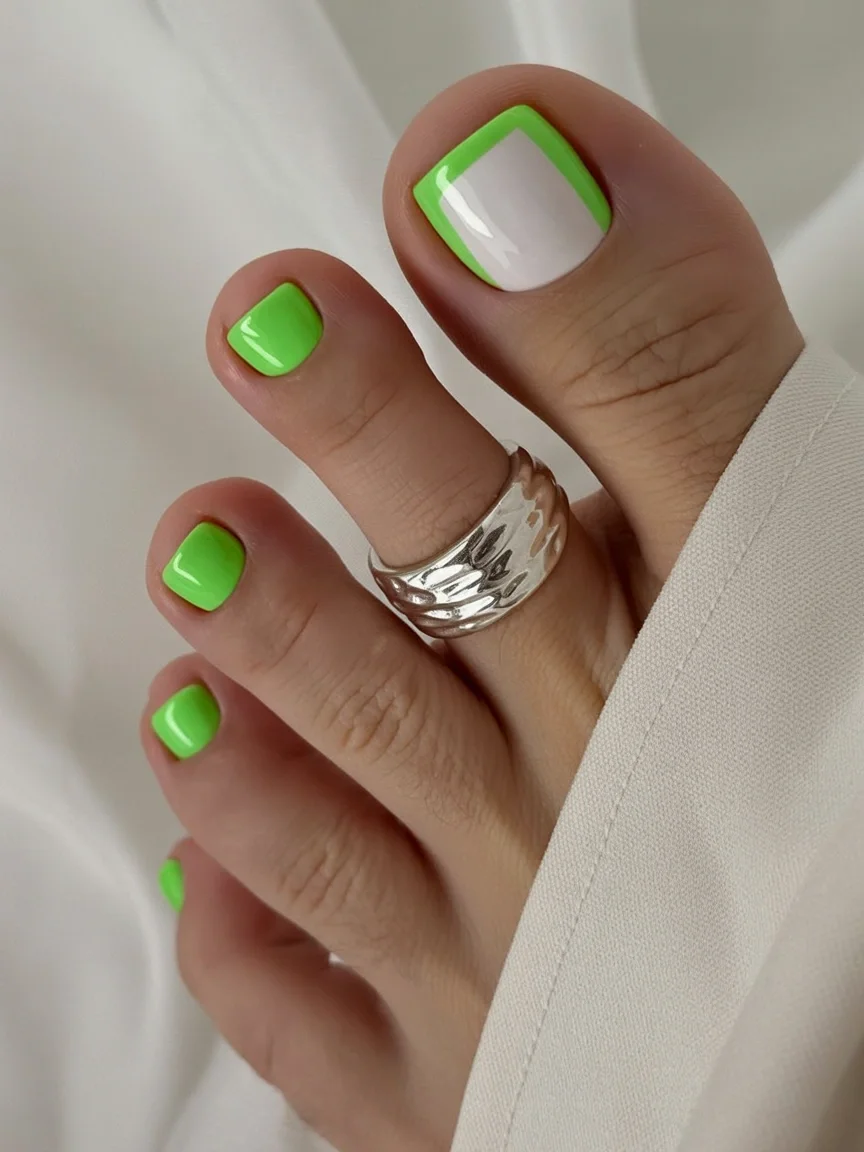
For this look, I would choose a highly pigmented neon green gel such as DND Limeade or OPI Green Come True, paired with a bright white gel polish. The sharp contrast between the two colors is what makes the design stand out, so opacity matters. A fine detail brush helps create the clean frame around the larger nail.
Creating this pedicure at home is easier than it looks. I would begin with the white center section on the big toe and then carefully outline it using the neon shade. The smaller nails can stay fully green, which balances the overall design and keeps the accent nail as the focal point. Sometimes the simplest ideas end up looking the most fashion-forward.
What I appreciate most is how versatile it feels. Whether paired with linen sets, swimsuits, or casual denim, this bright green pedicure instantly makes summer outfits look more intentional.
Royal Blue Waves with Gold Accents
Deep cobalt blue always reminds me of clear summer skies just before sunset. In this design, the saturated blue polish creates a bold foundation while the white accent nail introduces elegant movement through flowing blue and metallic gold details. The result feels artistic without becoming overly complicated.
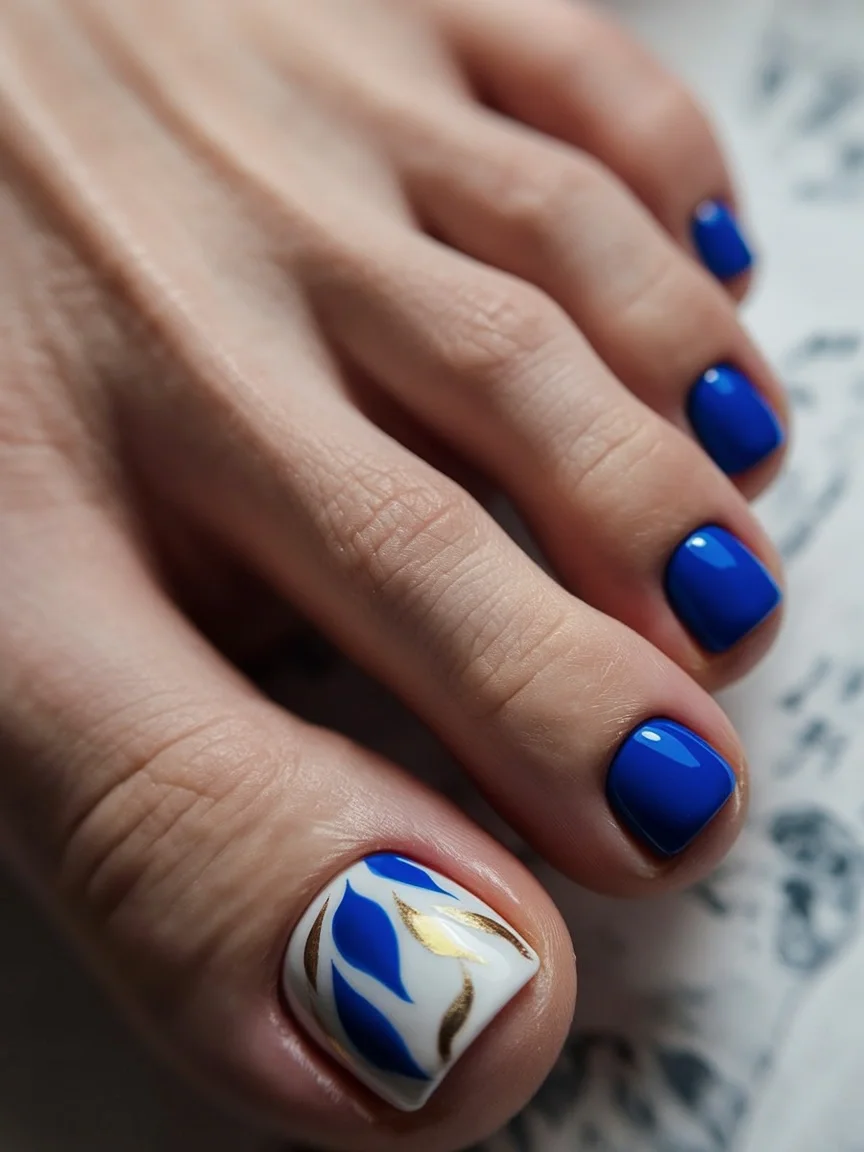
To recreate this look, I would use OPI My Car Has Navy-gation or a similar royal blue shade, along with a bright white gel base and metallic gold nail art paint. A thin liner brush is essential because the flowing details need to remain crisp and graceful.
The process begins with applying the solid blue color to the smaller nails. Once cured, I would paint the big toe white and slowly add the abstract blue and gold shapes layer by layer. The gold accent is subtle, but it transforms the design from everyday pedicure into something that feels almost jewelry-inspired.
This style reminds me of summer evenings by the water. It feels sophisticated, a little unexpected, and perfect for anyone who wants color without relying on neon shades.
Candy Swirl Colors for a Playful Summer Vibe
Some designs practically radiate happiness, and this one definitely belongs in that category. The combination of coral, turquoise, pink, yellow, and white creates a cheerful palette that feels inspired by frozen treats, boardwalk vacations, and everything fun about summer. The swirled accent nail ties all the shades together beautifully.
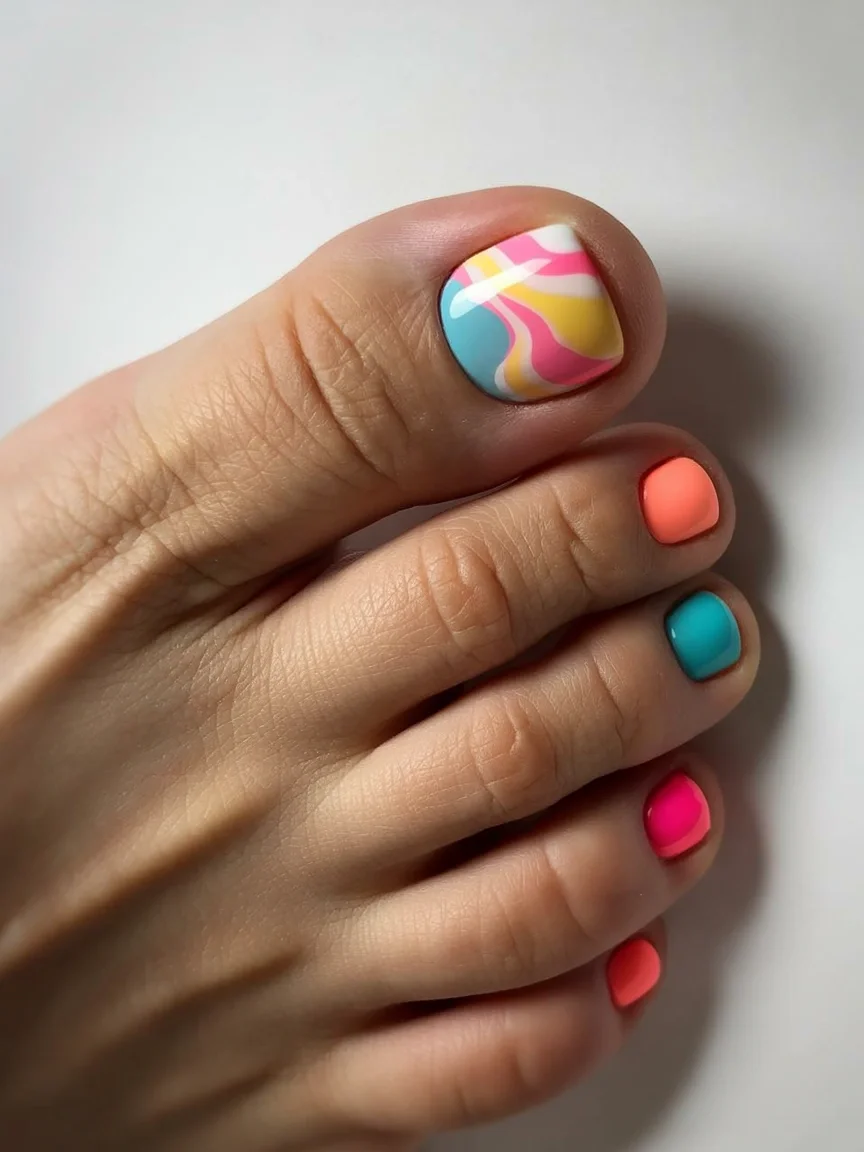
For materials, I would gather several bright gel colors including coral orange, turquoise blue, hot pink, sunshine yellow, and white. The accent design works best when the colors remain vibrant and distinct instead of blending together too much.
I would paint each smaller toe a different shade first, allowing every color to shine on its own. Then I would create the swirled pattern on the big toe using a thin detailing brush. The flowing lines should feel organic and relaxed rather than perfectly symmetrical. That carefree movement is what gives the design its personality.
Whenever I see colorful pedicures like this, I think about how beauty can instantly lift a mood. It is impossible not to smile when looking at a combination of colors this joyful.
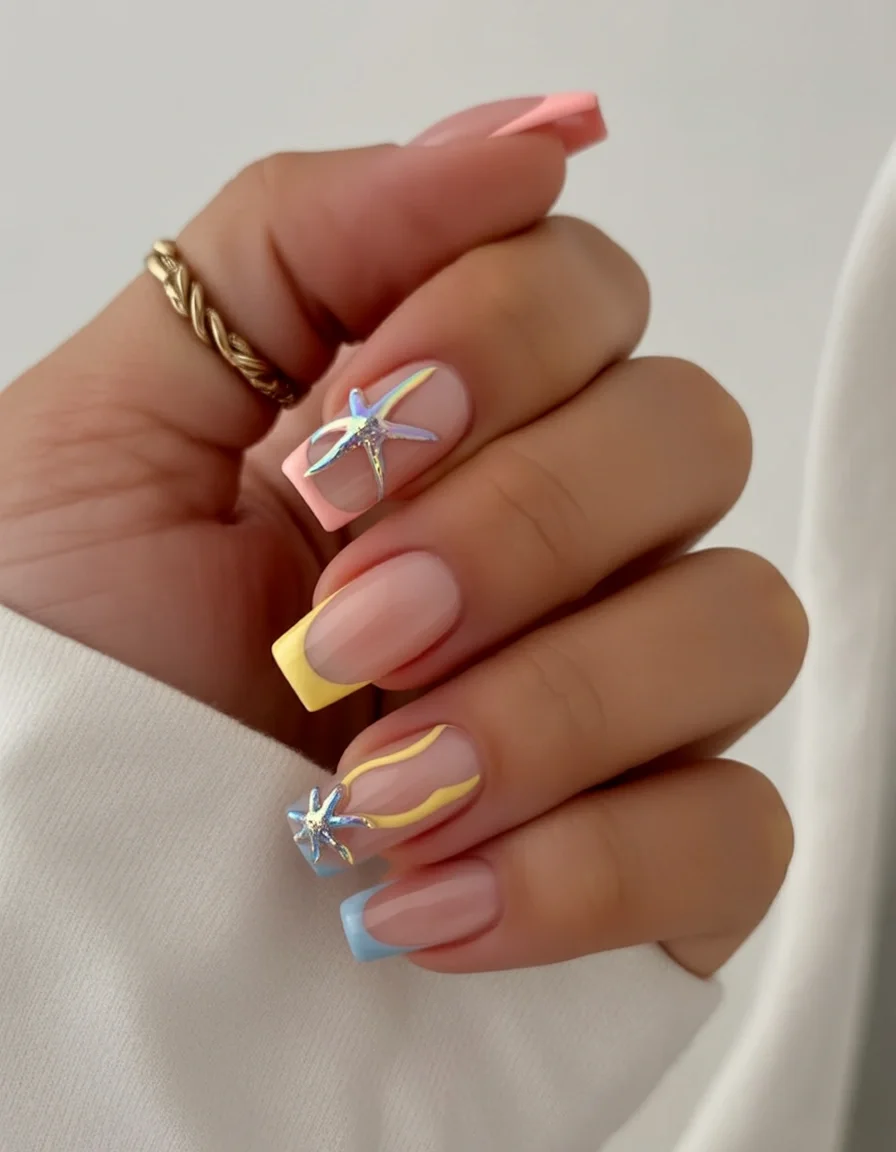
Pink Starfish Details for Beach Day Energy
Nothing says summer quite like starfish-inspired nail art. This design pairs glossy pink polish with soft white accent nails featuring charming pink starfish motifs. The look feels beachy and playful without becoming overly themed, which is exactly why I find it so wearable.
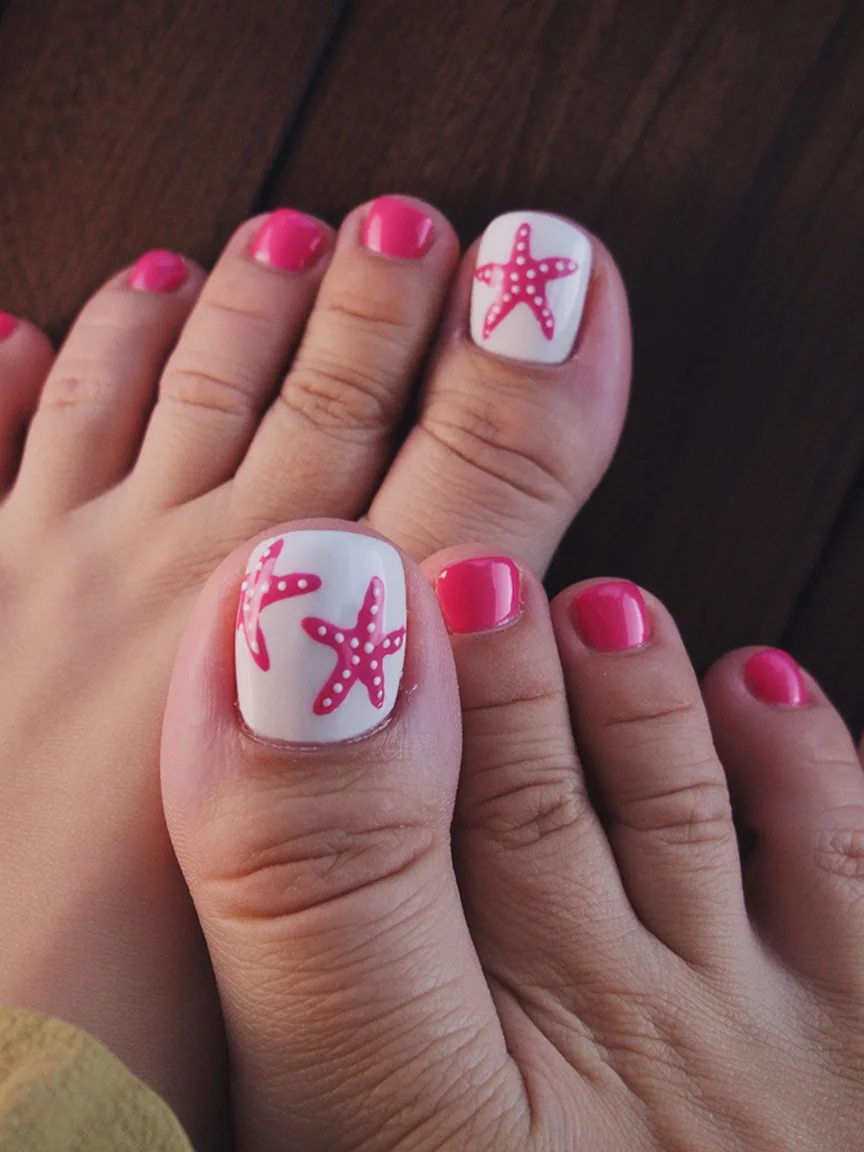
To create this pedicure, I would use a bright watermelon-pink polish along with a creamy white base for the accent nails. A fine detail brush or stamping tool can help create the starfish shapes and tiny decorative dots that add texture and realism.
The easiest approach is to complete the solid pink nails first and then focus entirely on the accent artwork. I like building starfish shapes gradually instead of trying to paint them in a single stroke. The little dots give the design extra character and make the starfish feel more dimensional.
This is one of those pedicures that instantly puts me in a vacation mindset. It feels perfect for coastal trips, beach weekends, or simply bringing a little seaside charm into everyday summer life.
Blue Floral Elegance for a Soft Coastal Look
Ending this group on a softer note, this floral pedicure feels delicate and timeless. The rich navy blue polish on the smaller toes creates beautiful contrast against the white accent nail, while the watercolor-style blue flowers add a gentle, artistic touch. The overall effect is refined, calm, and effortlessly pretty.
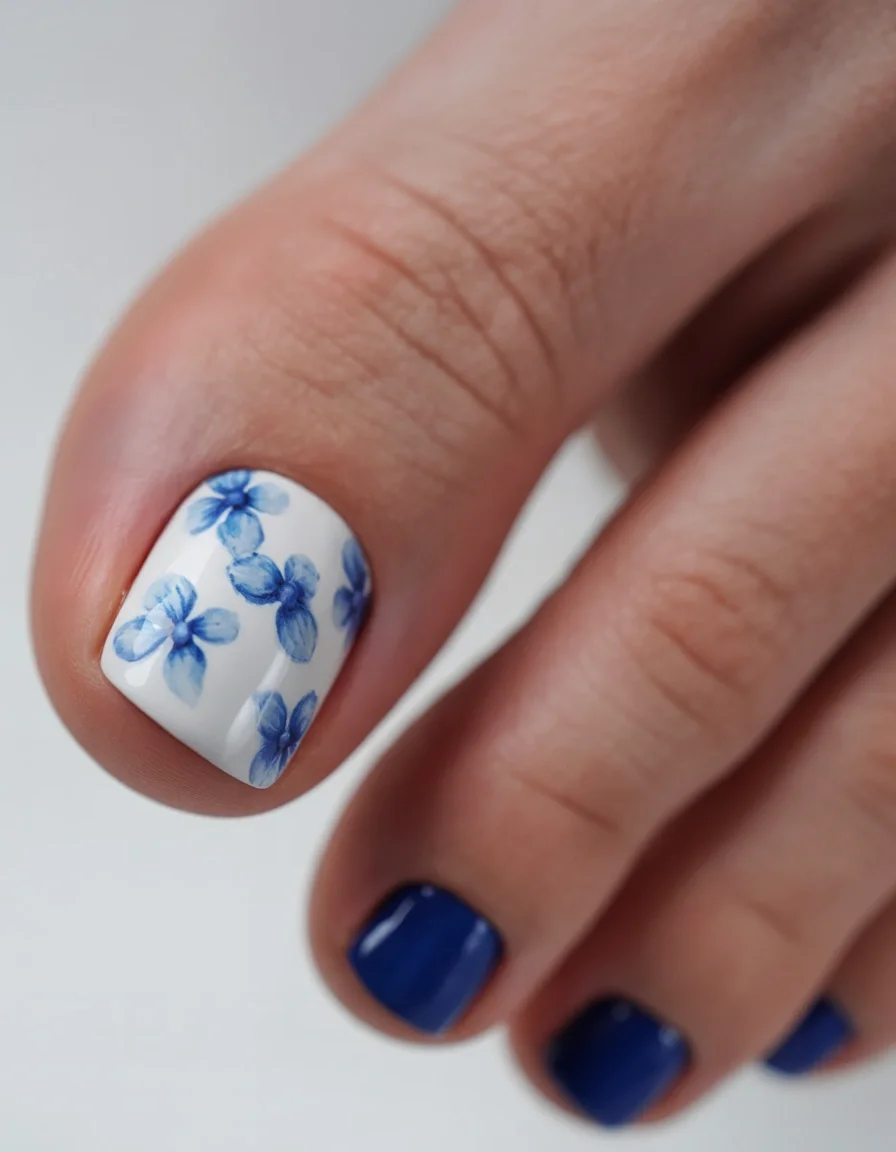
For this look, I would choose a classic navy gel polish paired with a bright white base and several shades of soft blue for the floral artwork. Watercolor gels or diluted gel paints work particularly well because they help create those delicate petal transitions.
When recreating the flowers, I would start by painting the petals lightly and gradually layering deeper blue tones toward the center. Many professional nail artists recommend working in translucent layers when creating floral designs because it produces a more natural painted effect, and that advice definitely applies here.
Personally, I love how this pedicure feels both seasonal and timeless. While many summer designs focus on bright colors and bold patterns, this one offers a quieter kind of beauty that still feels perfectly suited to warm July days.
Classic Stars and Stripes for Independence Day
Some holiday pedicures lean heavily into theme territory, but this one strikes a balance that feels surprisingly stylish. The bright red polish on the smaller toes creates a bold summer foundation, while the blue accent nail covered in crisp white stars instantly brings patriotic energy to the design. I like how the thin white striping adds just enough detail without making the overall look feel busy.
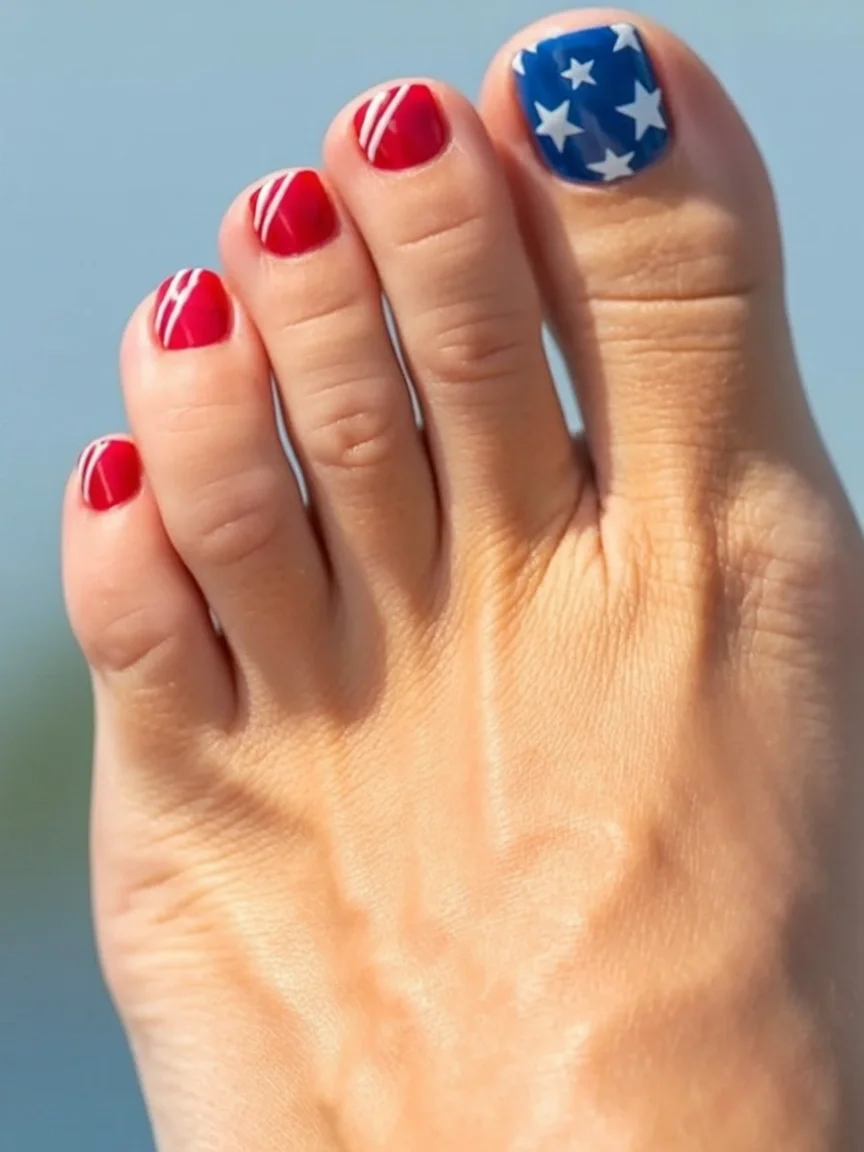
To recreate this look, I would use a true cherry red, a deep navy or royal blue, and a highly pigmented white gel polish. Nail art tape can help create the clean stripe details, while star decals or a fine liner brush make the accent nail much easier to execute.
The application process is fairly straightforward. I would paint all the smaller nails red first and allow them to cure completely. Then I would focus on the blue accent nail, adding the stars one at a time. The thin white striping works best when applied with quick, confident strokes rather than overworked lines.
For readers searching for 4th july toe nails design, this is one of the most wearable options in the article. It captures the spirit of the holiday while remaining simple enough to enjoy throughout the rest of July.
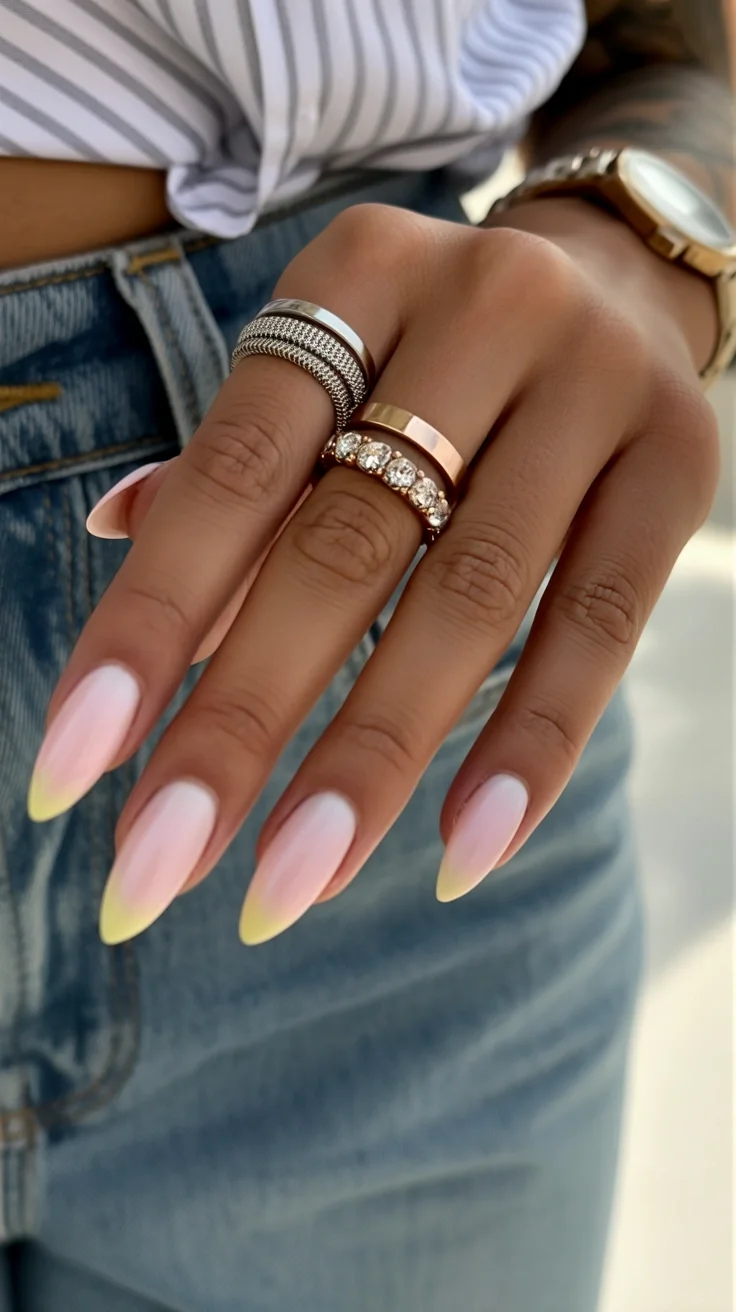
Pink Ombre Fade for a Soft Summer Glow
There is something timeless about a pink ombre pedicure. The gradual fade between bright pink and soft white feels airy, feminine, and effortlessly polished. Unlike more detailed nail art, this look relies on color blending to create visual interest, which gives it a clean and modern appearance.
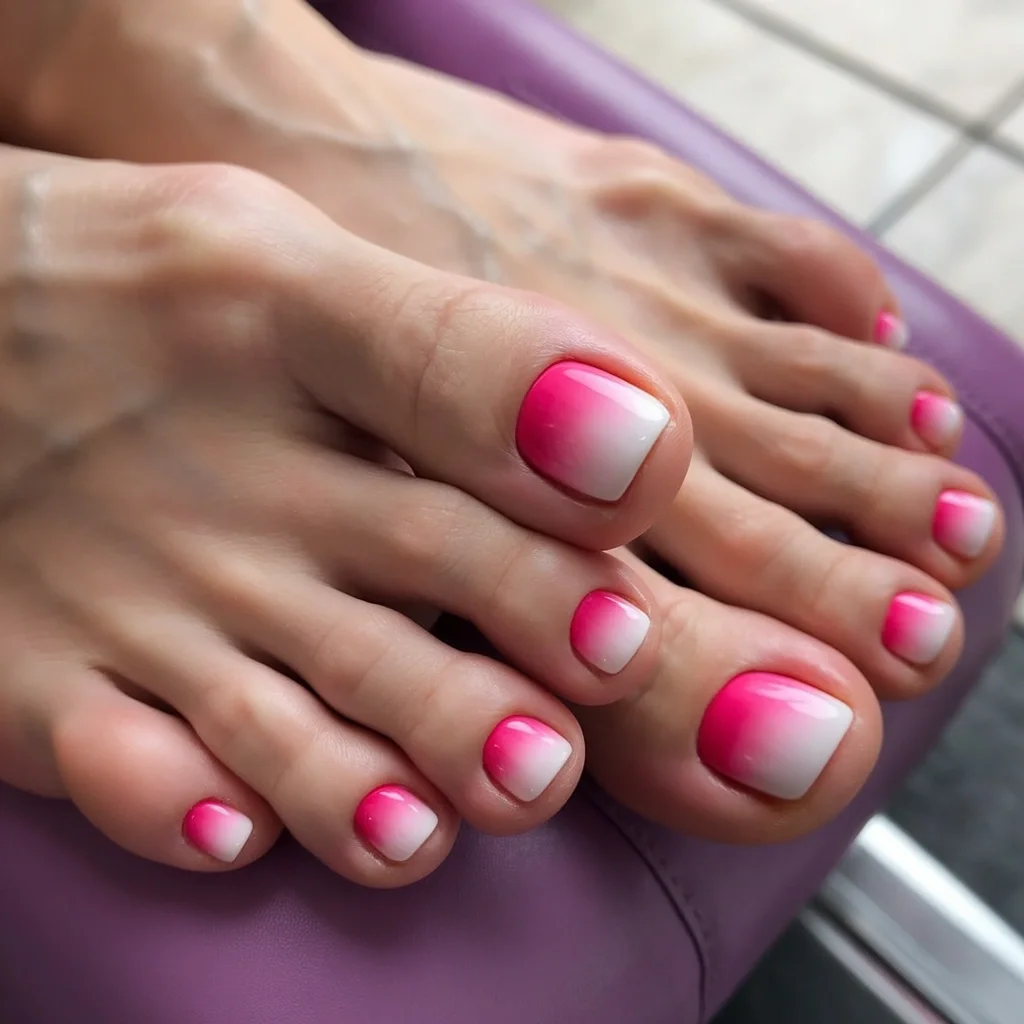
For this design, I would use a vibrant neon pink gel paired with a creamy white polish. A cosmetic sponge or specialized ombre brush helps blend the colors together smoothly. Many nail technicians prefer highly pigmented gels because they create a softer gradient with fewer layers.
When creating the fade, I usually apply the white and pink side by side before gently blending where the colors meet. It often takes two or three layers to achieve a seamless transition, but the result is worth the extra effort. A glossy top coat finishes everything beautifully.
I always think of ombre nails as the beauty equivalent of a summer sunset. They feel relaxed, flattering, and elegant without requiring complicated artwork.
Blue Firework Bursts for a Modern Holiday Look
Here is another patriotic idea, but with a completely different mood. Instead of mixing multiple colors across every nail, this design uses a rich cobalt blue base throughout and lets the fireworks artwork become the focal point. The result feels sleek, coordinated, and surprisingly sophisticated.
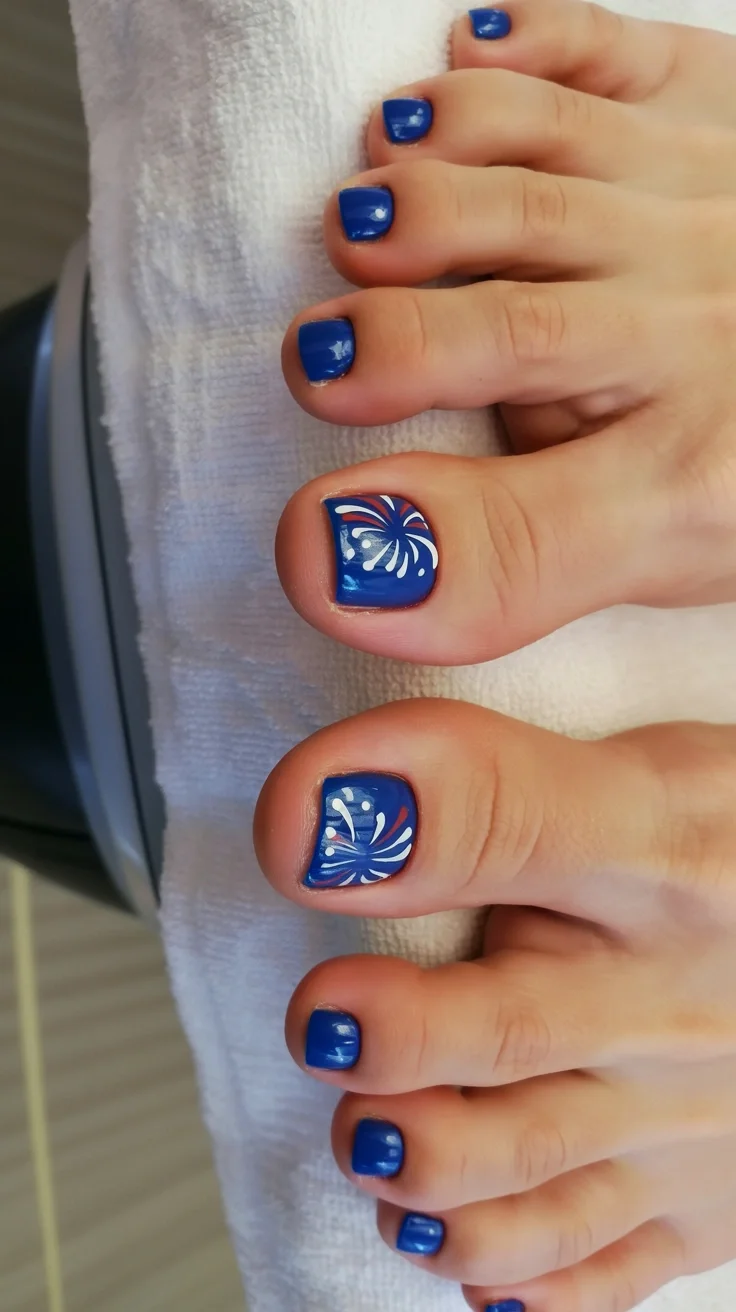
I would use a vivid cobalt gel polish along with white and red detailing paints for the firework bursts. A fine liner brush is absolutely essential here because the radiating lines need to remain sharp and delicate against the dark background.
To recreate this design, I would paint all the nails blue first and cure each layer thoroughly. Once the base is complete, I would carefully add the fireworks to the larger nails, working outward from the center. Small white dots help create the impression of sparks and add extra dimension.
This is one of my favorite july 4th nails designs toe ideas because it feels less obvious than traditional flag-inspired artwork. It celebrates the holiday while maintaining a polished, fashion-forward look.
American Flag Details with a Touch of Sparkle
Few pedicures capture Independence Day quite as directly as this one. The combination of red, white, and blue nails is already festive, but the striped flag-inspired accent nails and silver glitter bring the entire design to life. It feels celebratory, cheerful, and perfect for a long holiday weekend.
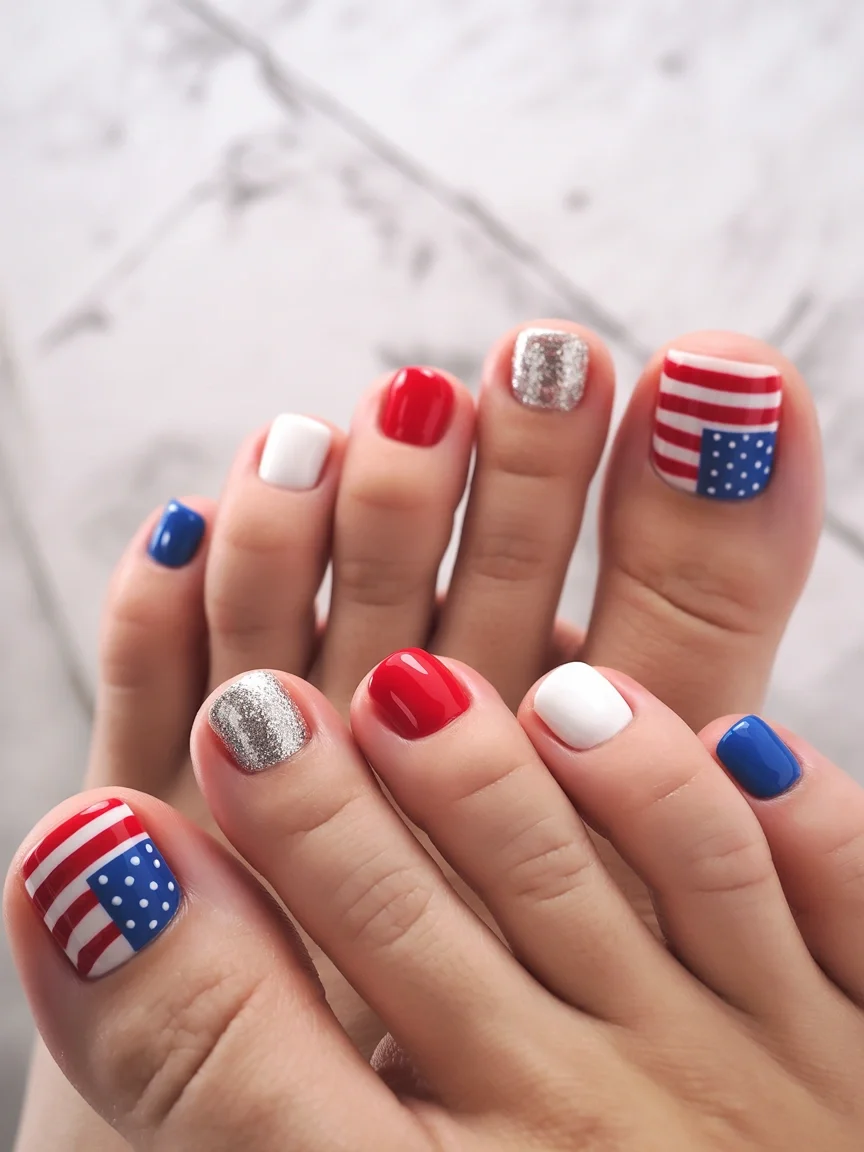
For materials, I would gather bright red, crisp white, navy blue, and silver glitter gel polish. Thin striping brushes are useful for creating the flag details, while dotting tools help place the tiny white stars and dots evenly across the design.
The easiest approach is to paint the solid-colored nails first and leave the accent nails for last. I like using guides or striping tape to keep the flag sections neat. The silver glitter adds contrast and prevents the design from feeling too predictable.
For anyone searching for 4th of july nail designs for toe nails, 4th of july toe nails art designs, or fourth of july toe nails designs, this pedicure checks every box. It is festive, recognizable, and made for summer celebrations.
Kiwi Green Speckles for a Tropical Twist
Ending this set with something playful, this bright green pedicure immediately reminded me of fresh kiwi fruit and tropical vacations. The glossy lime shade already feels energetic, but the black speckled detail on the accent nail adds texture and personality. It is simple nail art, yet it makes a strong impression.
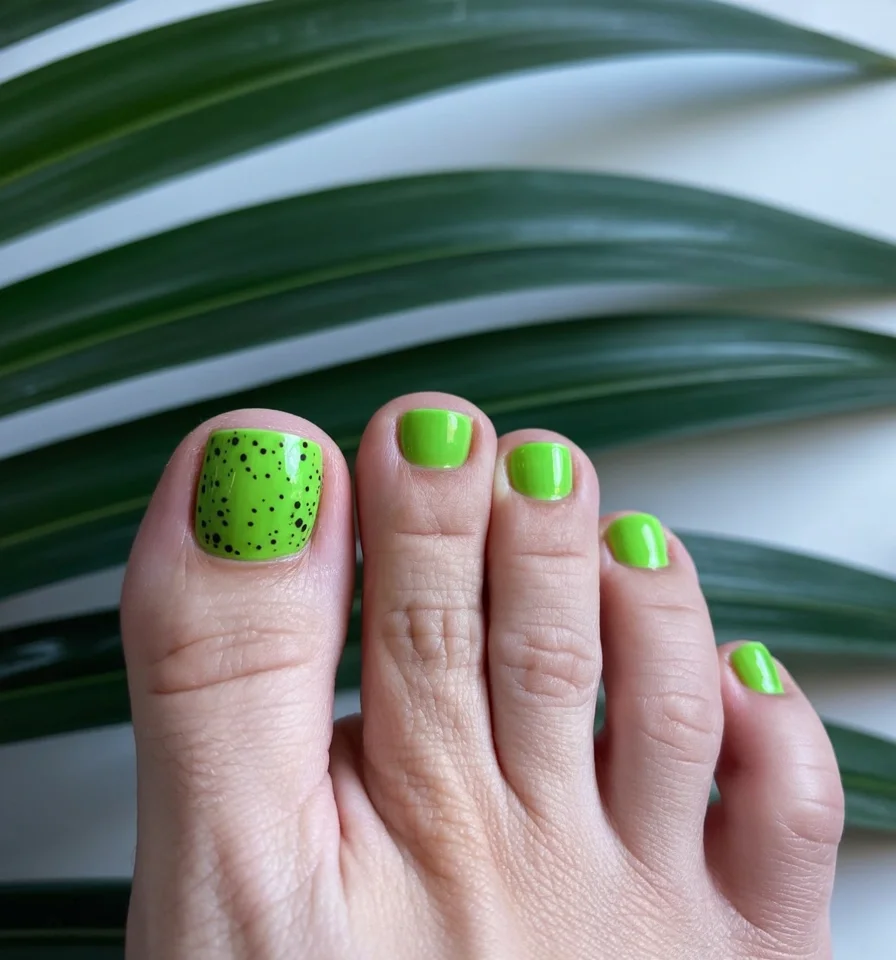
To recreate this look, I would use a vibrant lime green gel polish and a black speckle top coat or detail paint. The smaller nails remain solid green, allowing the accent nail to stand out without competing for attention.
Creating the effect at home is surprisingly easy. After applying the green base, I would use a thin brush to scatter irregular black dots across the big toe. The randomness is important because it creates the natural fruit-inspired appearance that makes the design so charming.
What I love most about this pedicure is that it feels completely different from the usual summer themes. While many July designs focus on florals or patriotic colors, this one brings a fresh tropical mood that feels playful, unexpected, and absolutely perfect for warm-weather adventures.
Patriotic Polka Dots for a Playful Fourth of July
There is something charmingly retro about this red, white, and blue polka-dot pedicure. Instead of relying on stars, stripes, or fireworks, the design uses simple dots to create a festive look that feels lighthearted and fun. The alternating red and blue shades keep the pattern balanced, while the white dots add contrast that immediately catches the eye.
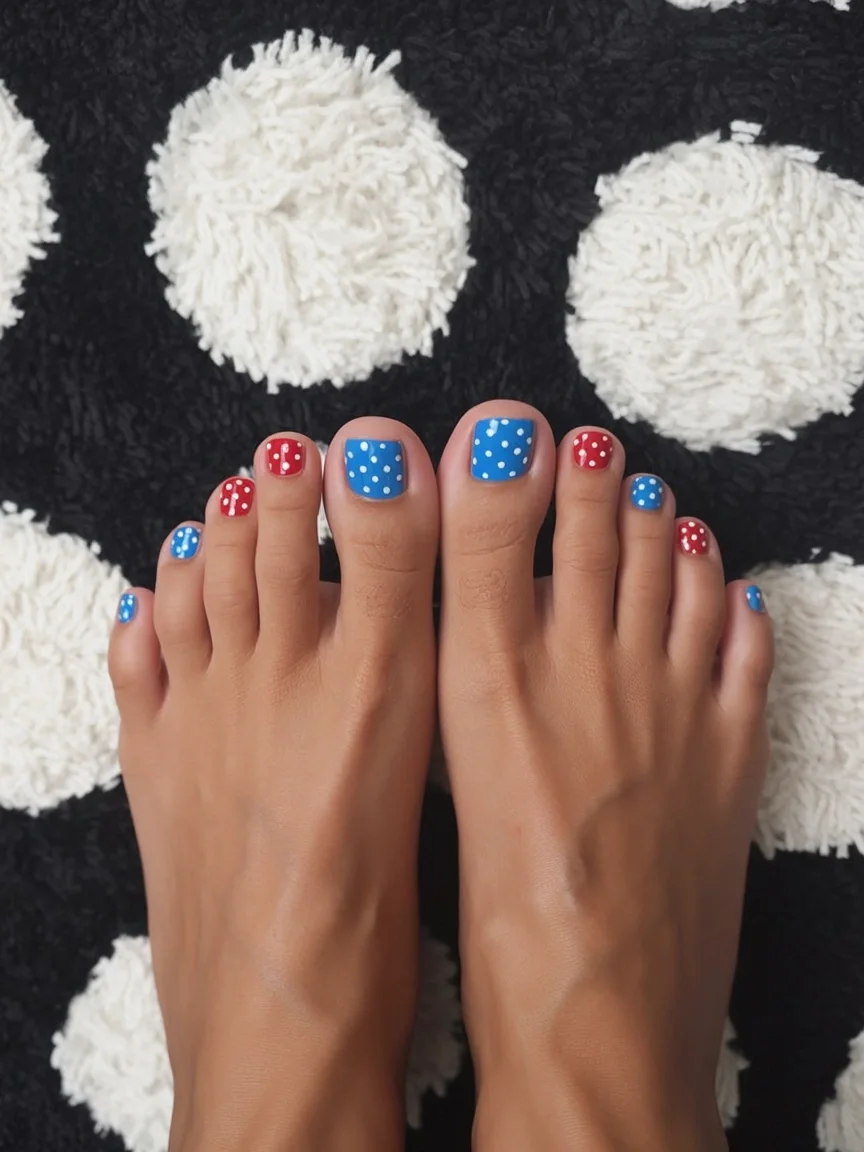
To recreate this style, I would use a bright cherry red, a medium sky blue, and a highly opaque white gel polish. A dotting tool is the most important item here because it helps keep the circles evenly sized. The beauty of this design is that it looks detailed while actually being beginner-friendly.
I would start by painting alternating nails red and blue before adding the white dots after curing. The key is spacing the dots evenly rather than crowding them together. Once a glossy top coat is applied, the pattern feels crisp and polished.
For readers looking for 4th of july toe nails design simple ideas, this is one of the easiest options to wear. It feels festive, cheerful, and perfect for everything from neighborhood barbecues to fireworks at the beach.
Hot Pink and Gold Lines with Modern Glamour
Bold pink always has a place in summer, but the addition of flowing metallic gold lines makes this pedicure feel especially elevated. The vibrant fuchsia base brings energy and confidence, while the delicate gold detailing introduces movement and sophistication. Together, they create a design that feels modern, artistic, and surprisingly luxurious.
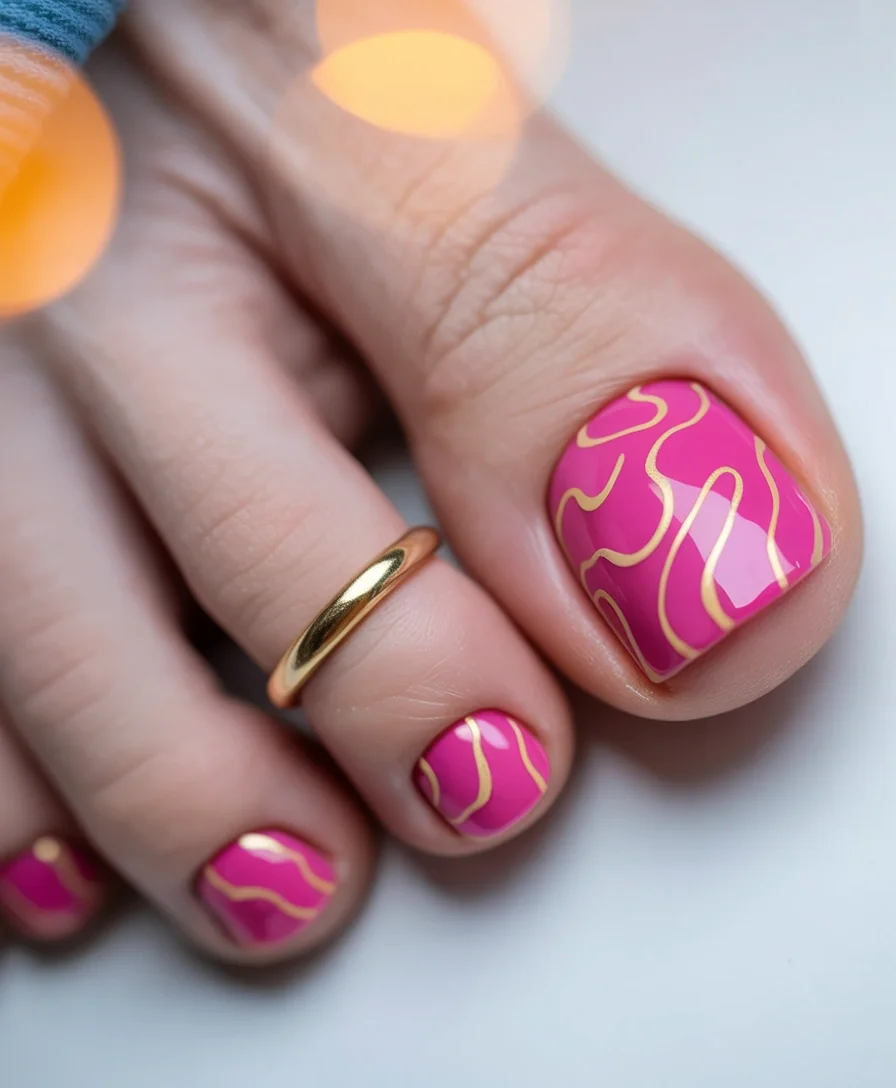
For this look, I would use a saturated pink gel polish and metallic gold nail art paint. A fine liner brush is essential because the elegance comes from the thin, flowing lines rather than thick graphic shapes. The smoother the curves, the more expensive the design appears.
When creating the artwork, I like to let the pink base fully cure before adding the gold details. Then I slowly draw organic curves across each nail, allowing the lines to vary slightly. Perfect symmetry is not necessary. In fact, the irregular movement makes the design feel more natural and stylish.
This is the kind of pedicure I would choose for summer weddings, rooftop dinners, or vacation evenings. It manages to feel playful and glamorous at the same time, which is not always easy to achieve.
Turquoise and Peach Coastal Glow
Some color combinations instantly remind me of summer postcards, and turquoise paired with soft peach is one of them. This pedicure balances cool and warm tones beautifully. The solid turquoise nails create a refreshing base, while the peach accent nail with silver shimmer adds a subtle beach-inspired glow.
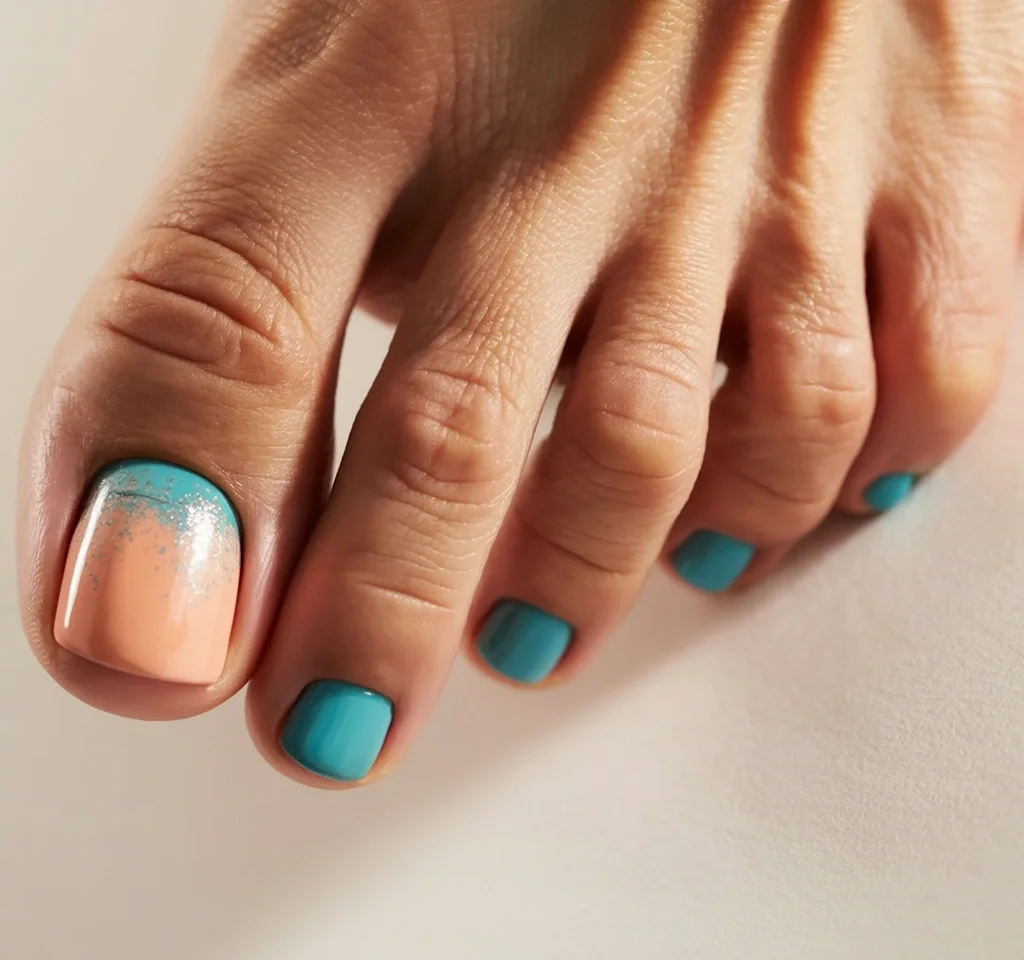
To recreate this design, I would choose a vibrant turquoise gel, a soft peach nude, and a silver glitter or chrome pigment for the accent detail. The shimmer effect works best when concentrated toward one edge of the nail, creating a soft gradient rather than full coverage sparkle.
I would begin with the solid turquoise color on the smaller nails and save the accent nail for last. The peach base should remain smooth and clean before lightly blending the silver shimmer into the upper section. This technique creates an airy effect that feels almost like sunlight reflecting on water.
What I enjoy most is how versatile the color palette feels. It works equally well for a tropical vacation, a poolside weekend, or simply adding a touch of summer brightness to everyday life.
Color Block Brights for a Retro Summer Statement
This design feels straight out of a vintage summer fashion campaign. The combination of lavender, yellow, coral pink, and deep violet creates a bold color-block effect that instantly grabs attention. The accent nails use curved sections of color rather than straight geometric lines, which softens the overall look and keeps it playful.
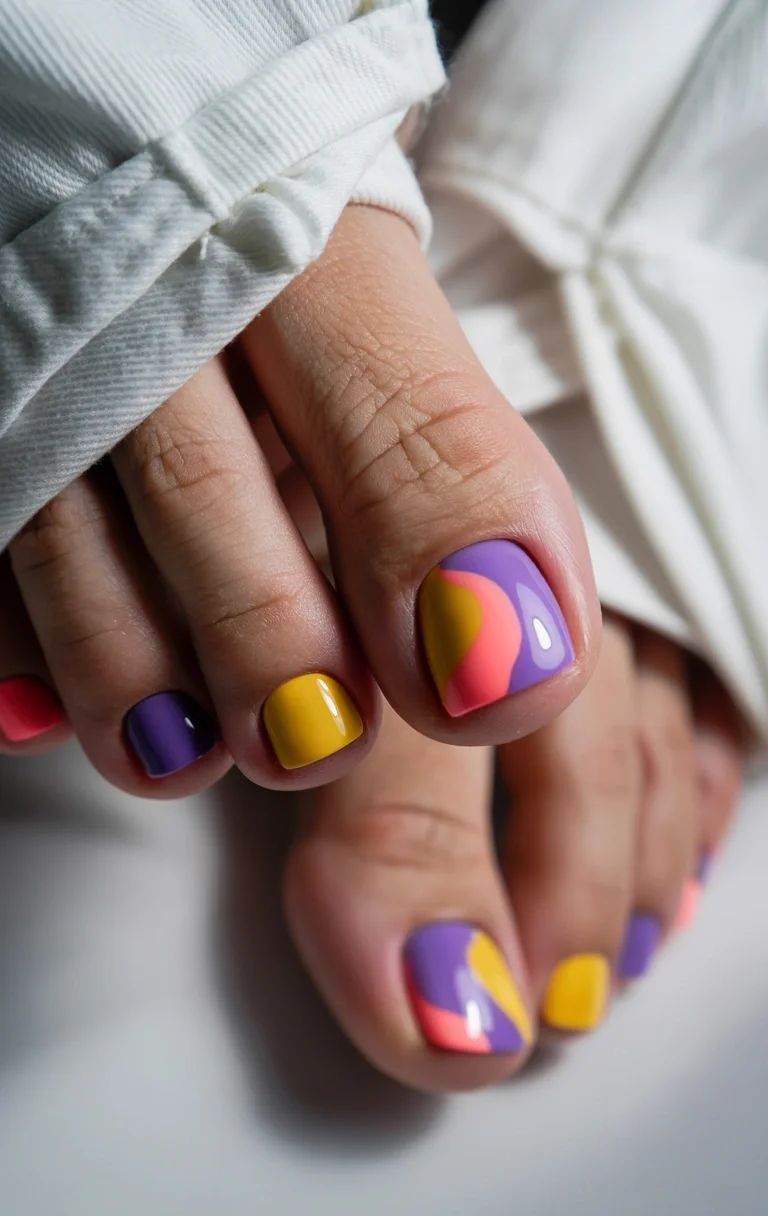
For this style, I would gather several highly pigmented gel polishes in bright summer shades. Precision brushes help create the curved color transitions, while a glossy top coat enhances the vivid contrast between each section.
The process requires a bit of patience because each color needs to be applied separately and cured before moving on to the next. I usually sketch the shapes lightly before filling them in. That extra step helps keep the design balanced across both feet.
Whenever I see bold color blocking like this, I think of fashion trends from the 1960s and 1970s reimagined for modern beauty. It feels creative, optimistic, and completely suited to the carefree mood of July.
Lemon Slice Nail Art for Sunny Summer Days
Few designs feel more perfectly matched to summer than fresh lemon nail art. The bright yellow polish immediately brings sunshine to the pedicure, while the lemon slice accents on the larger nails add a playful fruit-inspired detail that feels both cute and refreshing. It is the kind of design that practically radiates warm-weather energy.
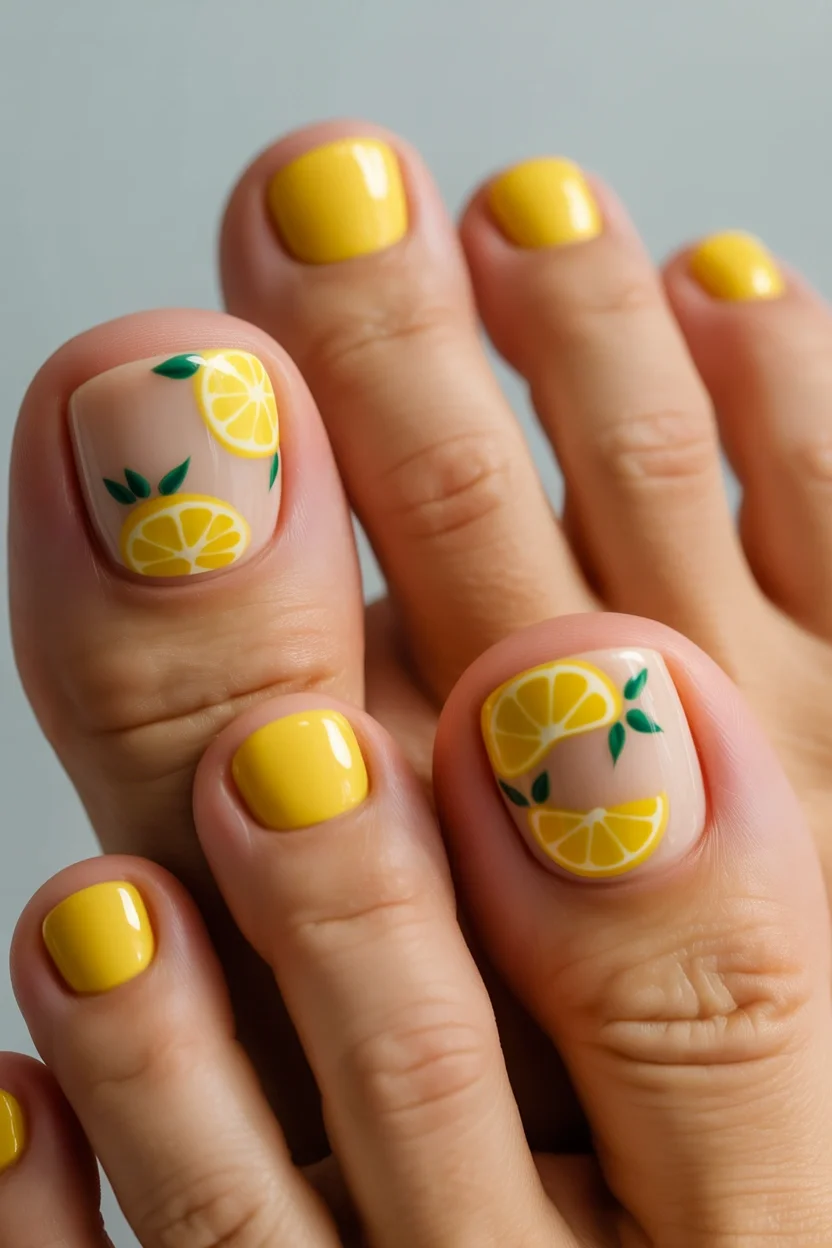
To create this look, I would use a cheerful lemon-yellow gel polish, a sheer nude base, green detailing paint for the leaves, and white and yellow art gels for the fruit segments. Fine detail brushes are useful because the citrus slices require a little precision.
I would paint the smaller nails solid yellow and then focus on building the lemon artwork layer by layer. Starting with the outline of each slice makes the process much easier. Once the details are complete, a glossy top coat gives the fruit a juicy, realistic finish.
This is one of those summer pedicures that instantly makes people smile. It feels fresh, seasonal, and full of personality. If July had an official fruit-inspired nail design, this one would be a strong contender.
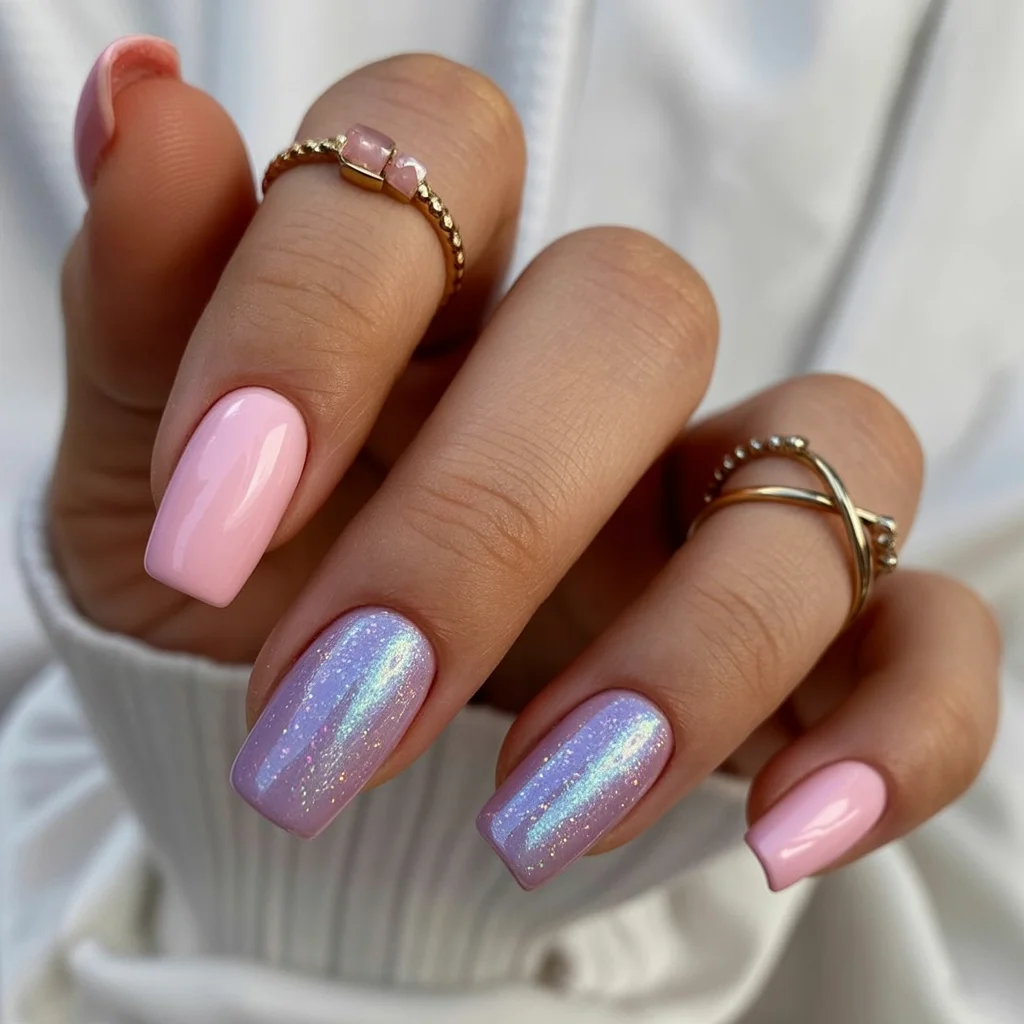
Midnight Glitter French for Summer Evenings
Not every July pedicure has to rely on bright colors or tropical themes. This design proves that darker shades can feel just as seasonal when paired with the right details. The soft blush nude base creates an elegant foundation, while the deep blue glitter French accent adds sparkle that catches the light beautifully. It reminds me of fireworks reflecting against a night sky or the shimmer of ocean water after sunset.

To recreate this look, I would use a sheer nude gel such as OPI Bubble Bath or a similar soft pink-beige shade. For the glitter section, a navy-blue holographic glitter gel works best because it creates depth and dimension rather than flat sparkle. The contrast between the delicate nude and the rich blue is what makes this design so striking.
I would begin by applying the nude base across all nails and curing it completely. Then I would carefully paint the glitter sections, concentrating the sparkle toward one side of the nail to create that modern French-inspired effect. A high-gloss top coat helps amplify the reflective particles and gives the entire pedicure a polished finish.
Personally, I love designs like this for summer evenings. They feel sophisticated and versatile, working just as well with casual sandals as they do with dressier vacation outfits. Sometimes a little sparkle is all a pedicure needs.
Blue Daisy Blooms for a Fresh Summer Garden Look
This daisy-inspired pedicure feels like a perfect July morning. The sky-blue background immediately creates a light and cheerful mood, while the white daisy petals and sunny yellow centers bring a playful floral touch. There is something timeless about daisies that never feels overly trendy, yet they always seem to fit the season perfectly.
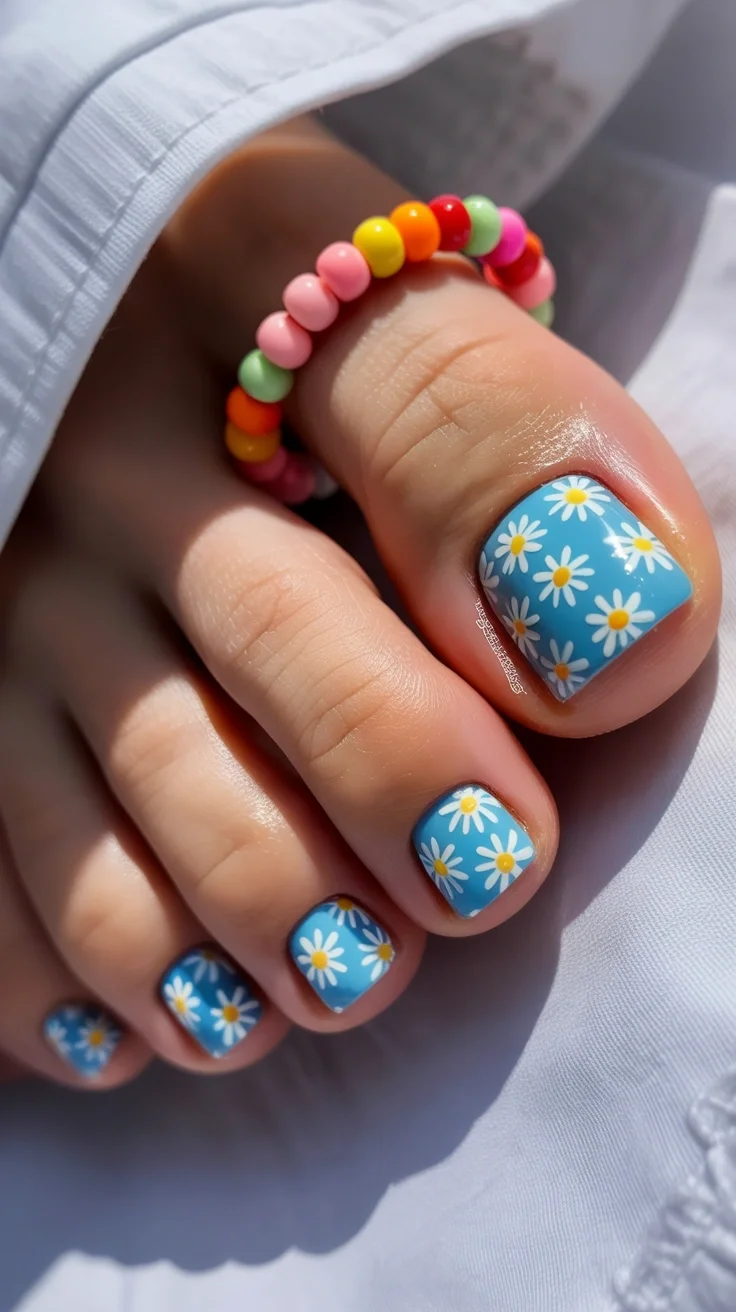
For this look, I would use a pastel blue gel polish, bright white art gel, and a small amount of yellow paint for the flower centers. A dotting tool and a fine nail art brush make the petals much easier to create. The design may look detailed, but the individual flowers are actually quite simple once you break them into small steps.
When creating the daisies, I like starting with the yellow center dots and then adding the petals around them. This approach helps keep the flowers balanced and evenly spaced. Many nail artists recommend working on one flower at a time rather than painting all the centers first, and I find that advice especially helpful for floral designs.
What I enjoy most about this pedicure is its cheerful personality. It feels sweet without being childish and colorful without being overwhelming. If summer could be translated into a floral toe nail design, this would be a strong contender. It captures the carefree spirit of warm July afternoons perfectly and brings a little sunshine to every step.
July is the perfect time to have a little fun with your pedicure. Whether you love bold patriotic patterns, bright tropical shades, delicate florals, playful fruit-inspired art, or elegant minimalist designs, summer 2026 offers endless ways to express your personality through your toe nails. I always find that the best pedicure is not necessarily the trendiest one, but the one that makes you smile every time you slip on your favorite sandals. Hopefully these ideas have inspired you to try something new this season and bring a little extra color, creativity, and confidence to every summer adventure.